Preparing a file for printing is a key step in the process of implementing any graphic design project. A well-prepared file helps avoid errors, saves time and money, and ensures that the final product meets expectations. You will know how to prepare a file for printing, after reading this article. Here we will discuss the most important aspects of preparing files for printing, paying attention to file formats, color settings, margins, bleeds, and other important elements.
Correct preparation of the design for printing temporary tattoos:
- vector files are preferred, for example Corel Draw, Adobe Illustrator, EPS, PDF – always with text converted to curves and CMYK color mode,
- the design should be in 1:1 scale,
- for bitmap projects, please use a transparent background,
- the recommended minimum resolution of the design for printing is 300 dpi,
- if the pattern contains white, please add a background in a solid, dark color,
- the tattoo design must have a margin of at least 3 mm from the cutting edge,
- When placing multiple designs on a piece of cardboard, it is best to keep a distance of 3 mm between them.
Choosing the right file format

The file format in which we save the project is of great importance. The most commonly used formats for printing are:
– PDF: This is the most universal format that maintains high quality and allows you to protect the project from accidental changes. It is worth making sure that you save the file in the PDF/X-1a version, which is the standard for printing.
– TIFF: Lossless format, ideal for saving raster graphics. Recommended when the highest image quality is important.
– EPS: Used mainly for vector graphics. Provides scalability and high quality.
– JPEG: Can be used, but only with high resolution and appropriate compression.
Color settings
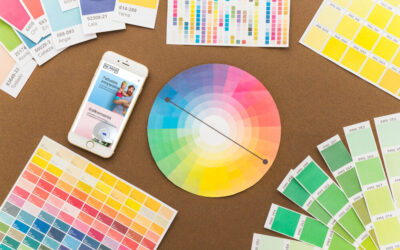
Printing uses the CMYK (Cyan, Magenta, Yellow, Black) color model, as opposed to the RGB model used on screens. Therefore, it is important to ensure that all design elements have been converted to CMYK before sending the file to the printer. You should also check:
– Color profile: Using the correct ICC profile for the printer can significantly affect the quality of the print.
– Spot colors (Pantone): If the design requires precise colors, it is worth using the Pantone system. It allows for uniform shades throughout the print run.
Resolution
The quality of an image in print depends on its resolution. The standard for printing is 300 dpi (dots per inch), graphics with a lower resolution may appear blurry or pixelated when printed. Before saving the file, make sure that all images used meet this requirement.
Bleeds and margins
Bleeds are the area of printing that extends beyond the edge of the final format. They are necessary to avoid white edges after cutting the paper. The standard bleed is 3-5 mm on each side. In addition, remember to include inside margins, which protect important design elements from accidental cutting. It is recommended to leave at least 5-10 mm from the edge.
Fonts and texts
To avoid font display problems in the print shop, it is best to:
– Convert the text to curves (vectors).
– Include the fonts in the file if possible.
– Make sure the font size is appropriate for readability on the printout. The minimum size is usually 6 points for printed text.
Lines and thicknesses
Lines used in the design should have a minimum thickness of 0.25 pt. Thinner lines may not be reproduced correctly on the printout.
Project Proofreading
Before sending the file to the printer, it is worth checking carefully:
– Whether all elements are properly placed.
– Whether the colors, resolution and bleeds are correct.
– Whether the file complies with the printer’s guidelines. Each printer may have specific requirements, so it is worth familiarizing yourself with their technical specifications.
Color test
If the design is particularly important, it is worth doing a color test (proof). This allows you to check how the design will look on paper and make any corrections before printing the entire run.
Compression and optimization
Print files can be large, especially if they contain many high-resolution graphics. It is important to optimize the file without sacrificing quality. In the case of PDF, you can use image compression, but always be careful to avoid quality degradation.
Communication with the printing house
The last but equally important step is communication with the printing house. Before sending the file, it is worth:
– Consulting the printing house staff if you have any doubts.
– Make sure that the file has been sent in the right format and meets all technical requirements.
– Familiarizing yourself with the implementation schedule and costs.
Summary
How to prepare a file for printing? Preparing a file for printing is a process that requires attention and precision. Each stage, from choosing the format to communicating with the printing house, is important for the quality of the final product. By following the above tips, we can be sure that our project will look professional and meet the expectations of both ourselves and our recipients. Remember that a well-prepared file is the basis for the success of any printed project.


